Blue Bruna

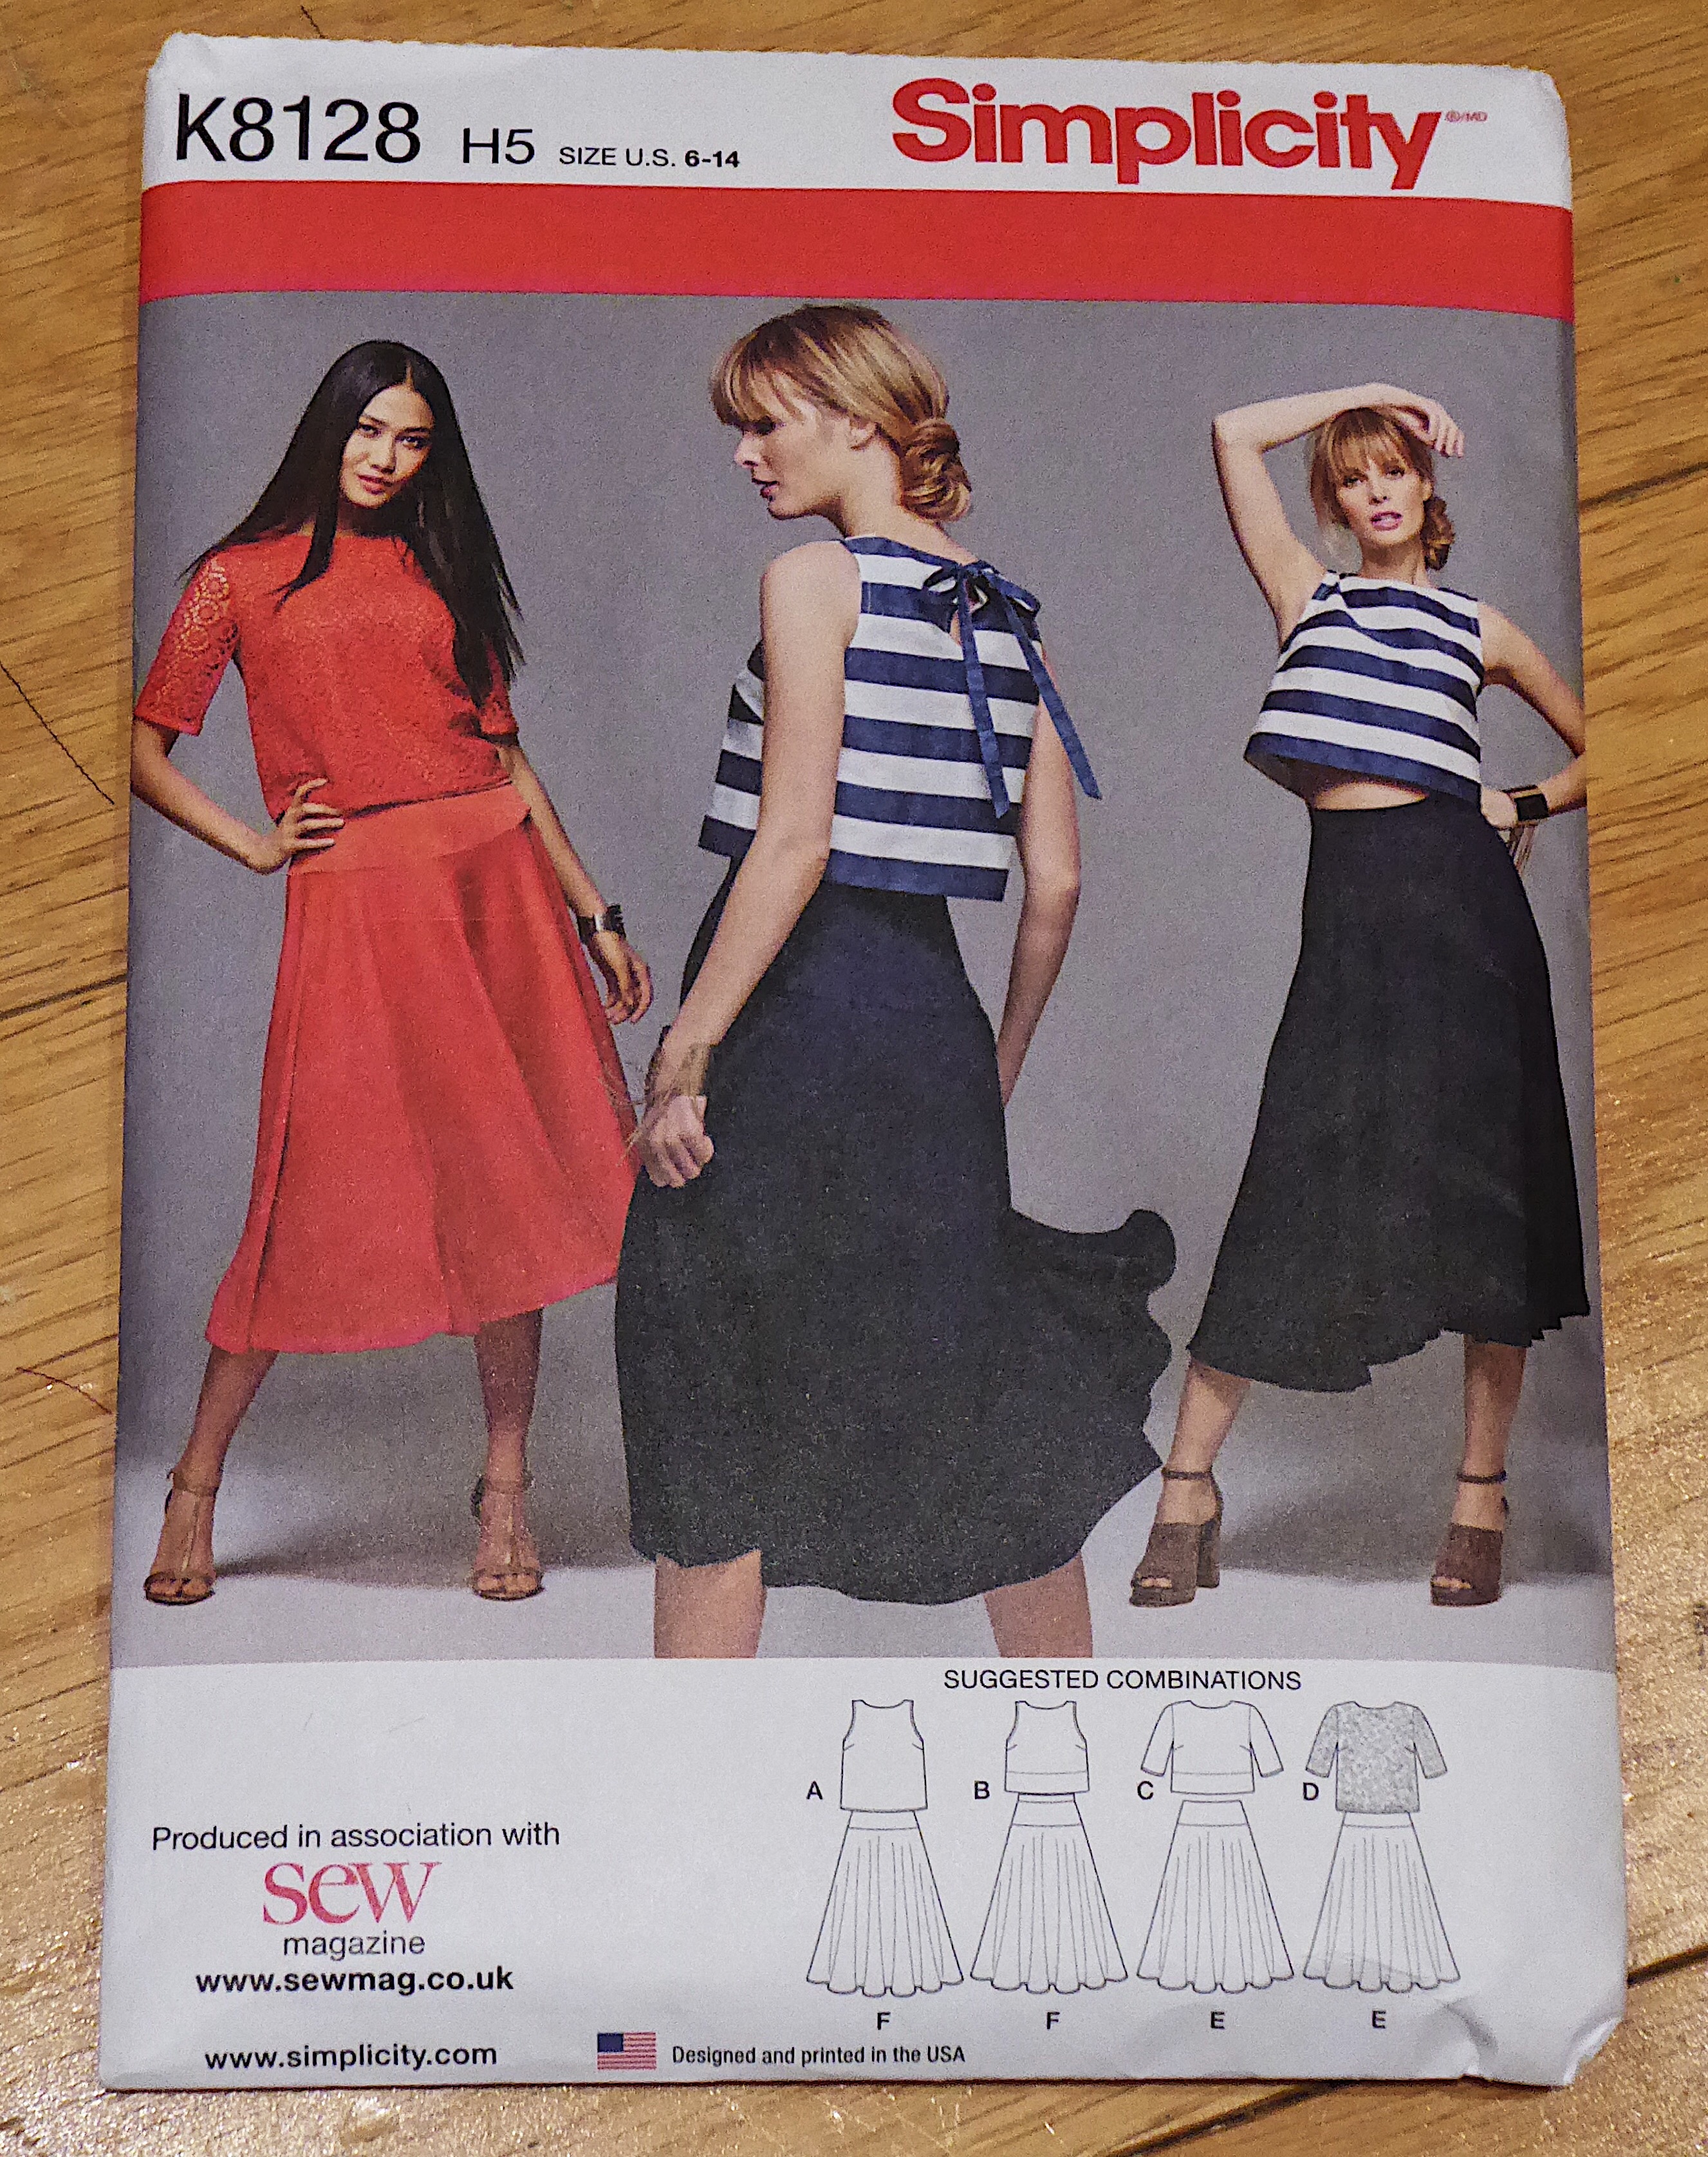
I’m a big fan of sewing magazines.. I started out on the ones with free Big 4 paper patterns (Sew Magazine, Love Sewing – you know the type), but I’m now veering towards those with overlapping patterns you have to trace off and initially cause a bit of a heart attack to look at (I’m looking at you Burda…).

A couple examples of these (and shout if you know of any others) are the aforementioned (and frequently hard to source) Burda Style, and La Maison Victor, which recently launched an English language version.  These two, to me, represent a more modern and slightly edgier style and even if I don’t end up making many of the patterns (see aforementioned overlapping pattern line heart attack), they are an endless source of inspiration.  Recently, I spotted the Bruna blouse in La Maison Victor and knew I had to give it a go.. So…

The Pattern.

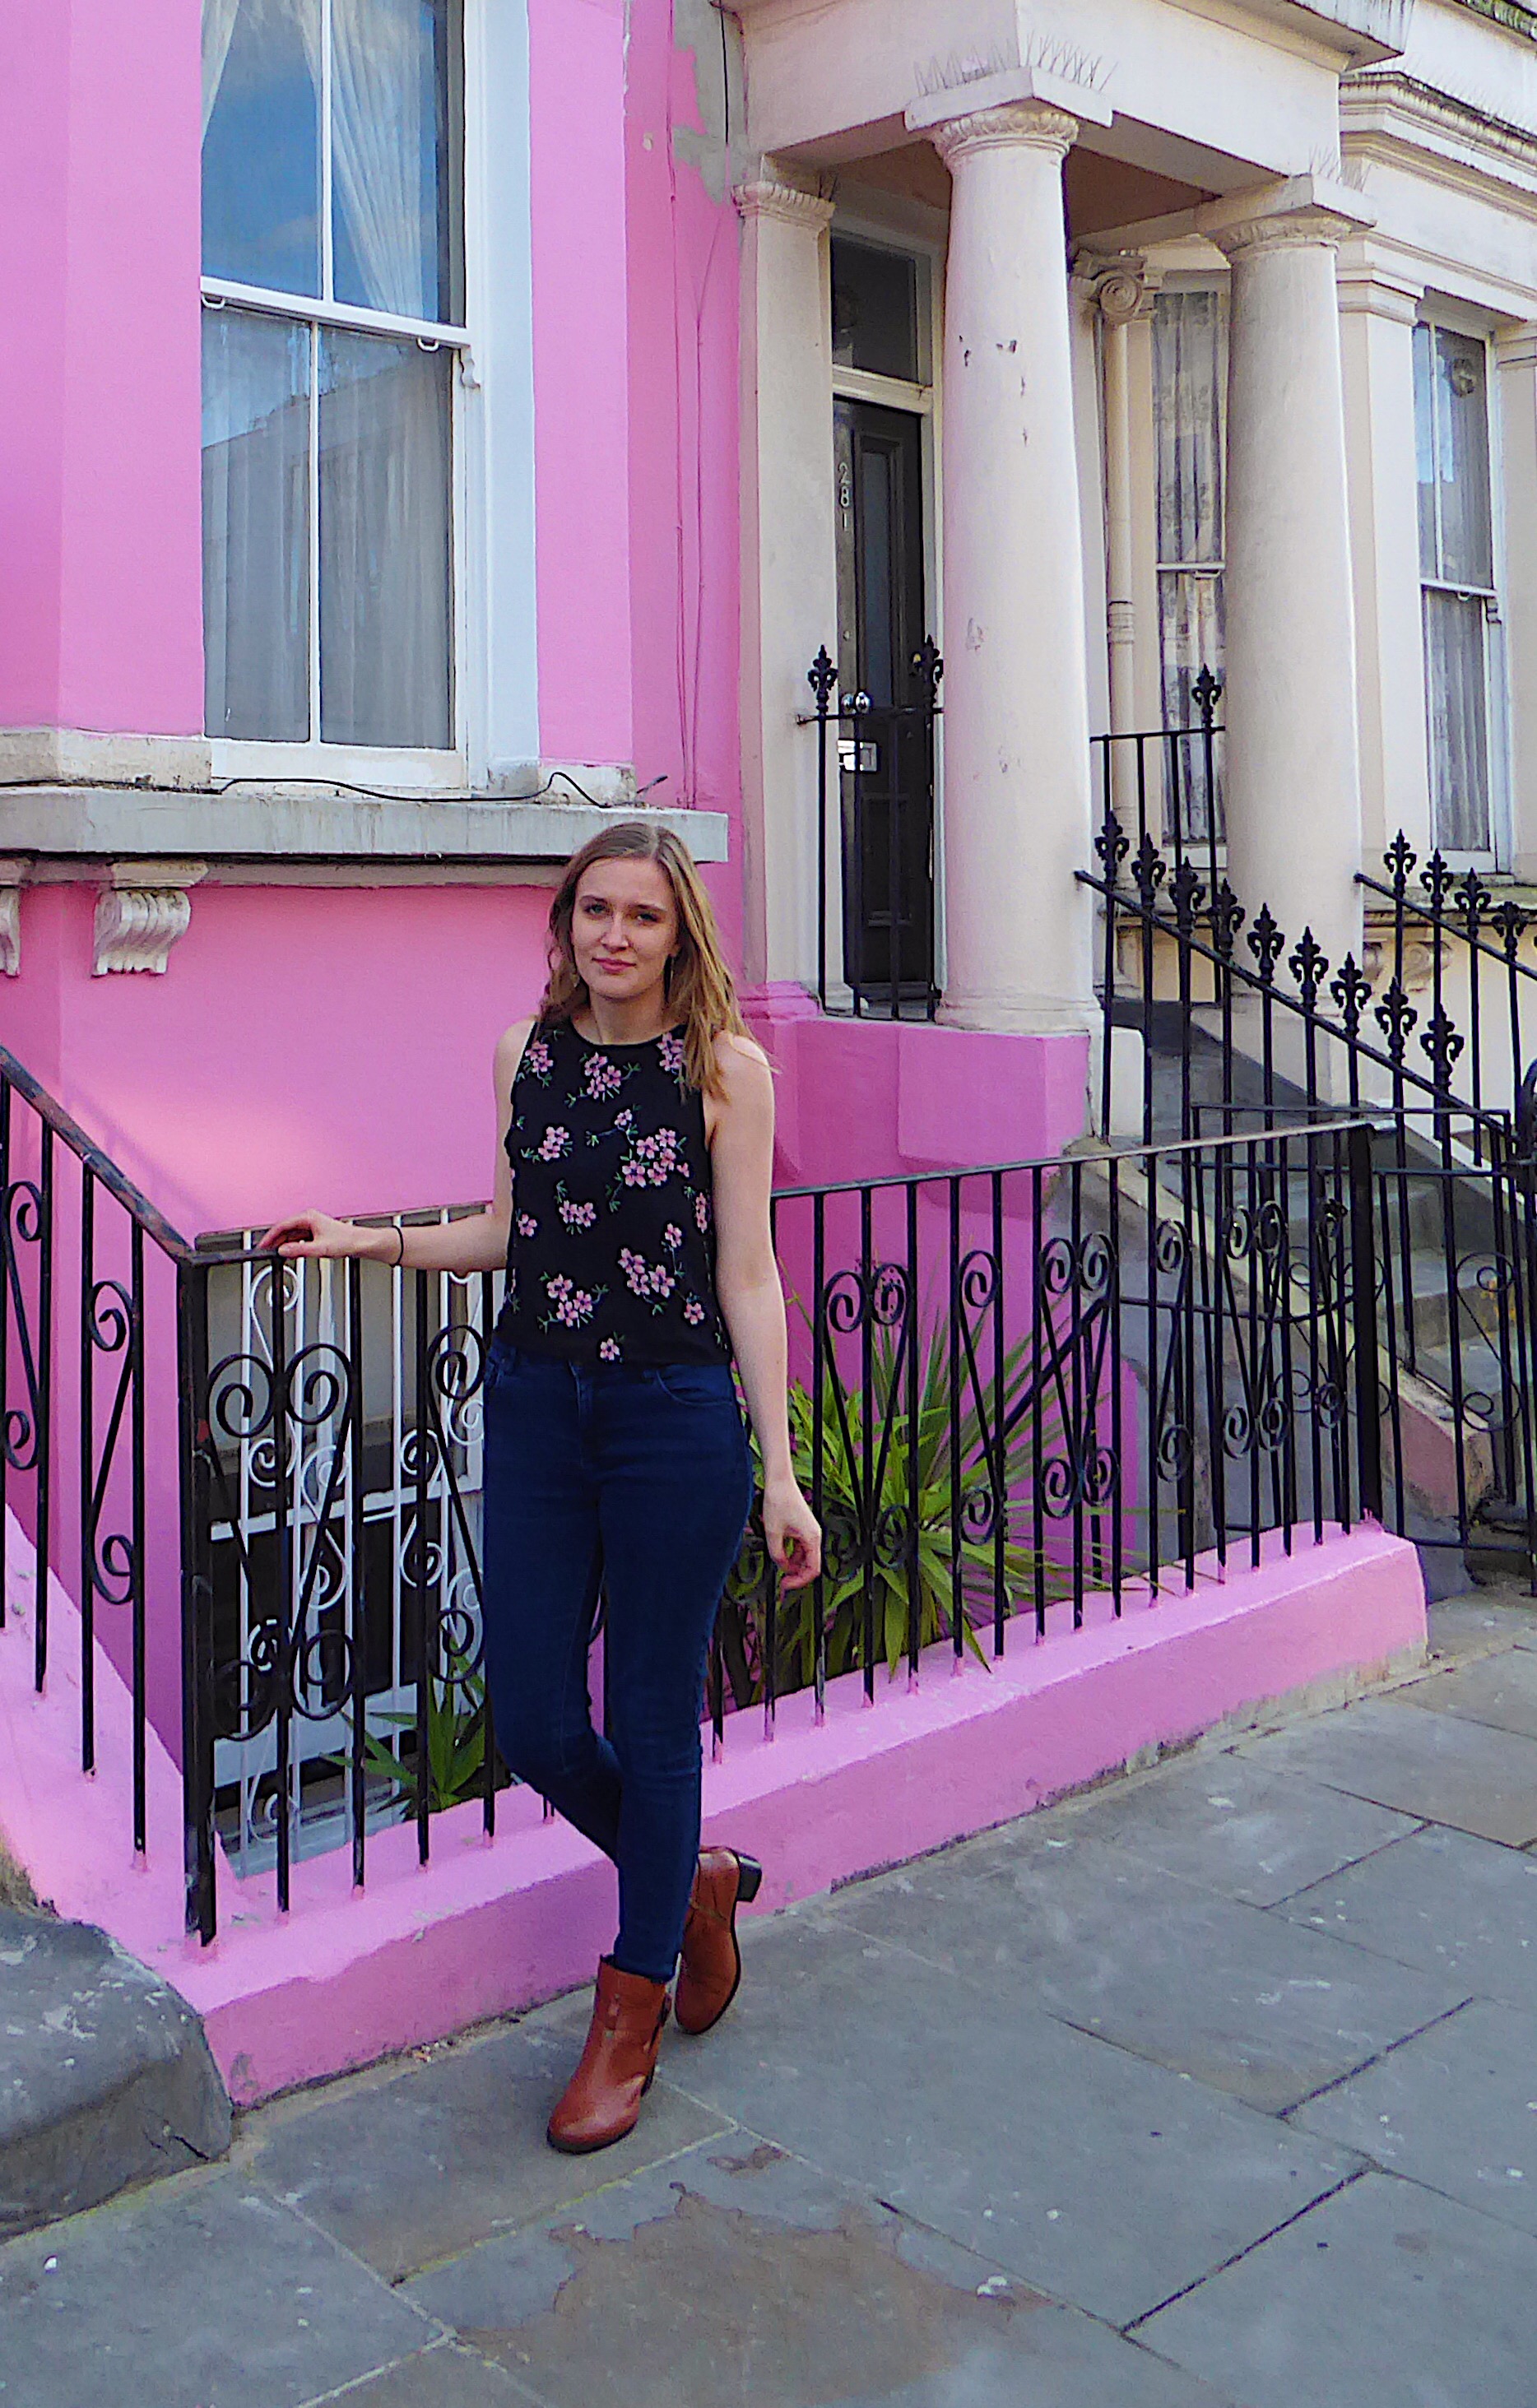
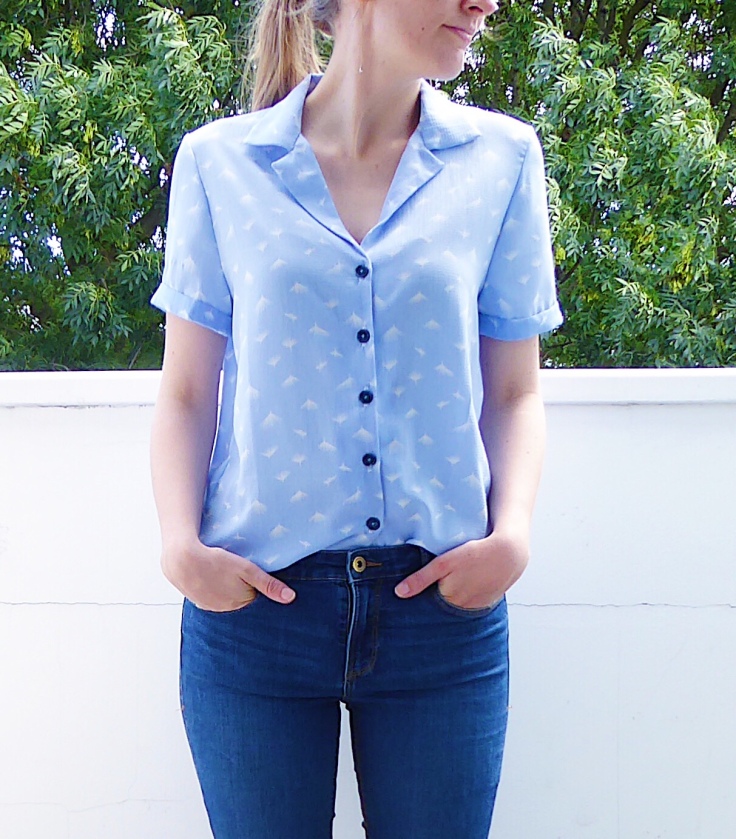
The Bruna blouse is a simple boxy short sleeved shirt.  It’s very similar to the Libby shirt from Sew Over It, which I had my eye on and thought I’d try the Bruna first since I already had the pattern.  Since LMV offer fewer patterns in their magazine, there’s fewer scary overlapping lines to trace from, so it’s pretty quick to put the pattern together.

I decided to leave off the pocket, mostly because I couldn’t be bothered to a) cut it out (yes I’m that lazy) and b) pattern match.  I think I actually prefer it without too, so that’s a happy accident (or am I just trying to convince myself that I meant to not cut out that pocket.. and I didn’t just forget…).

The Fabric.

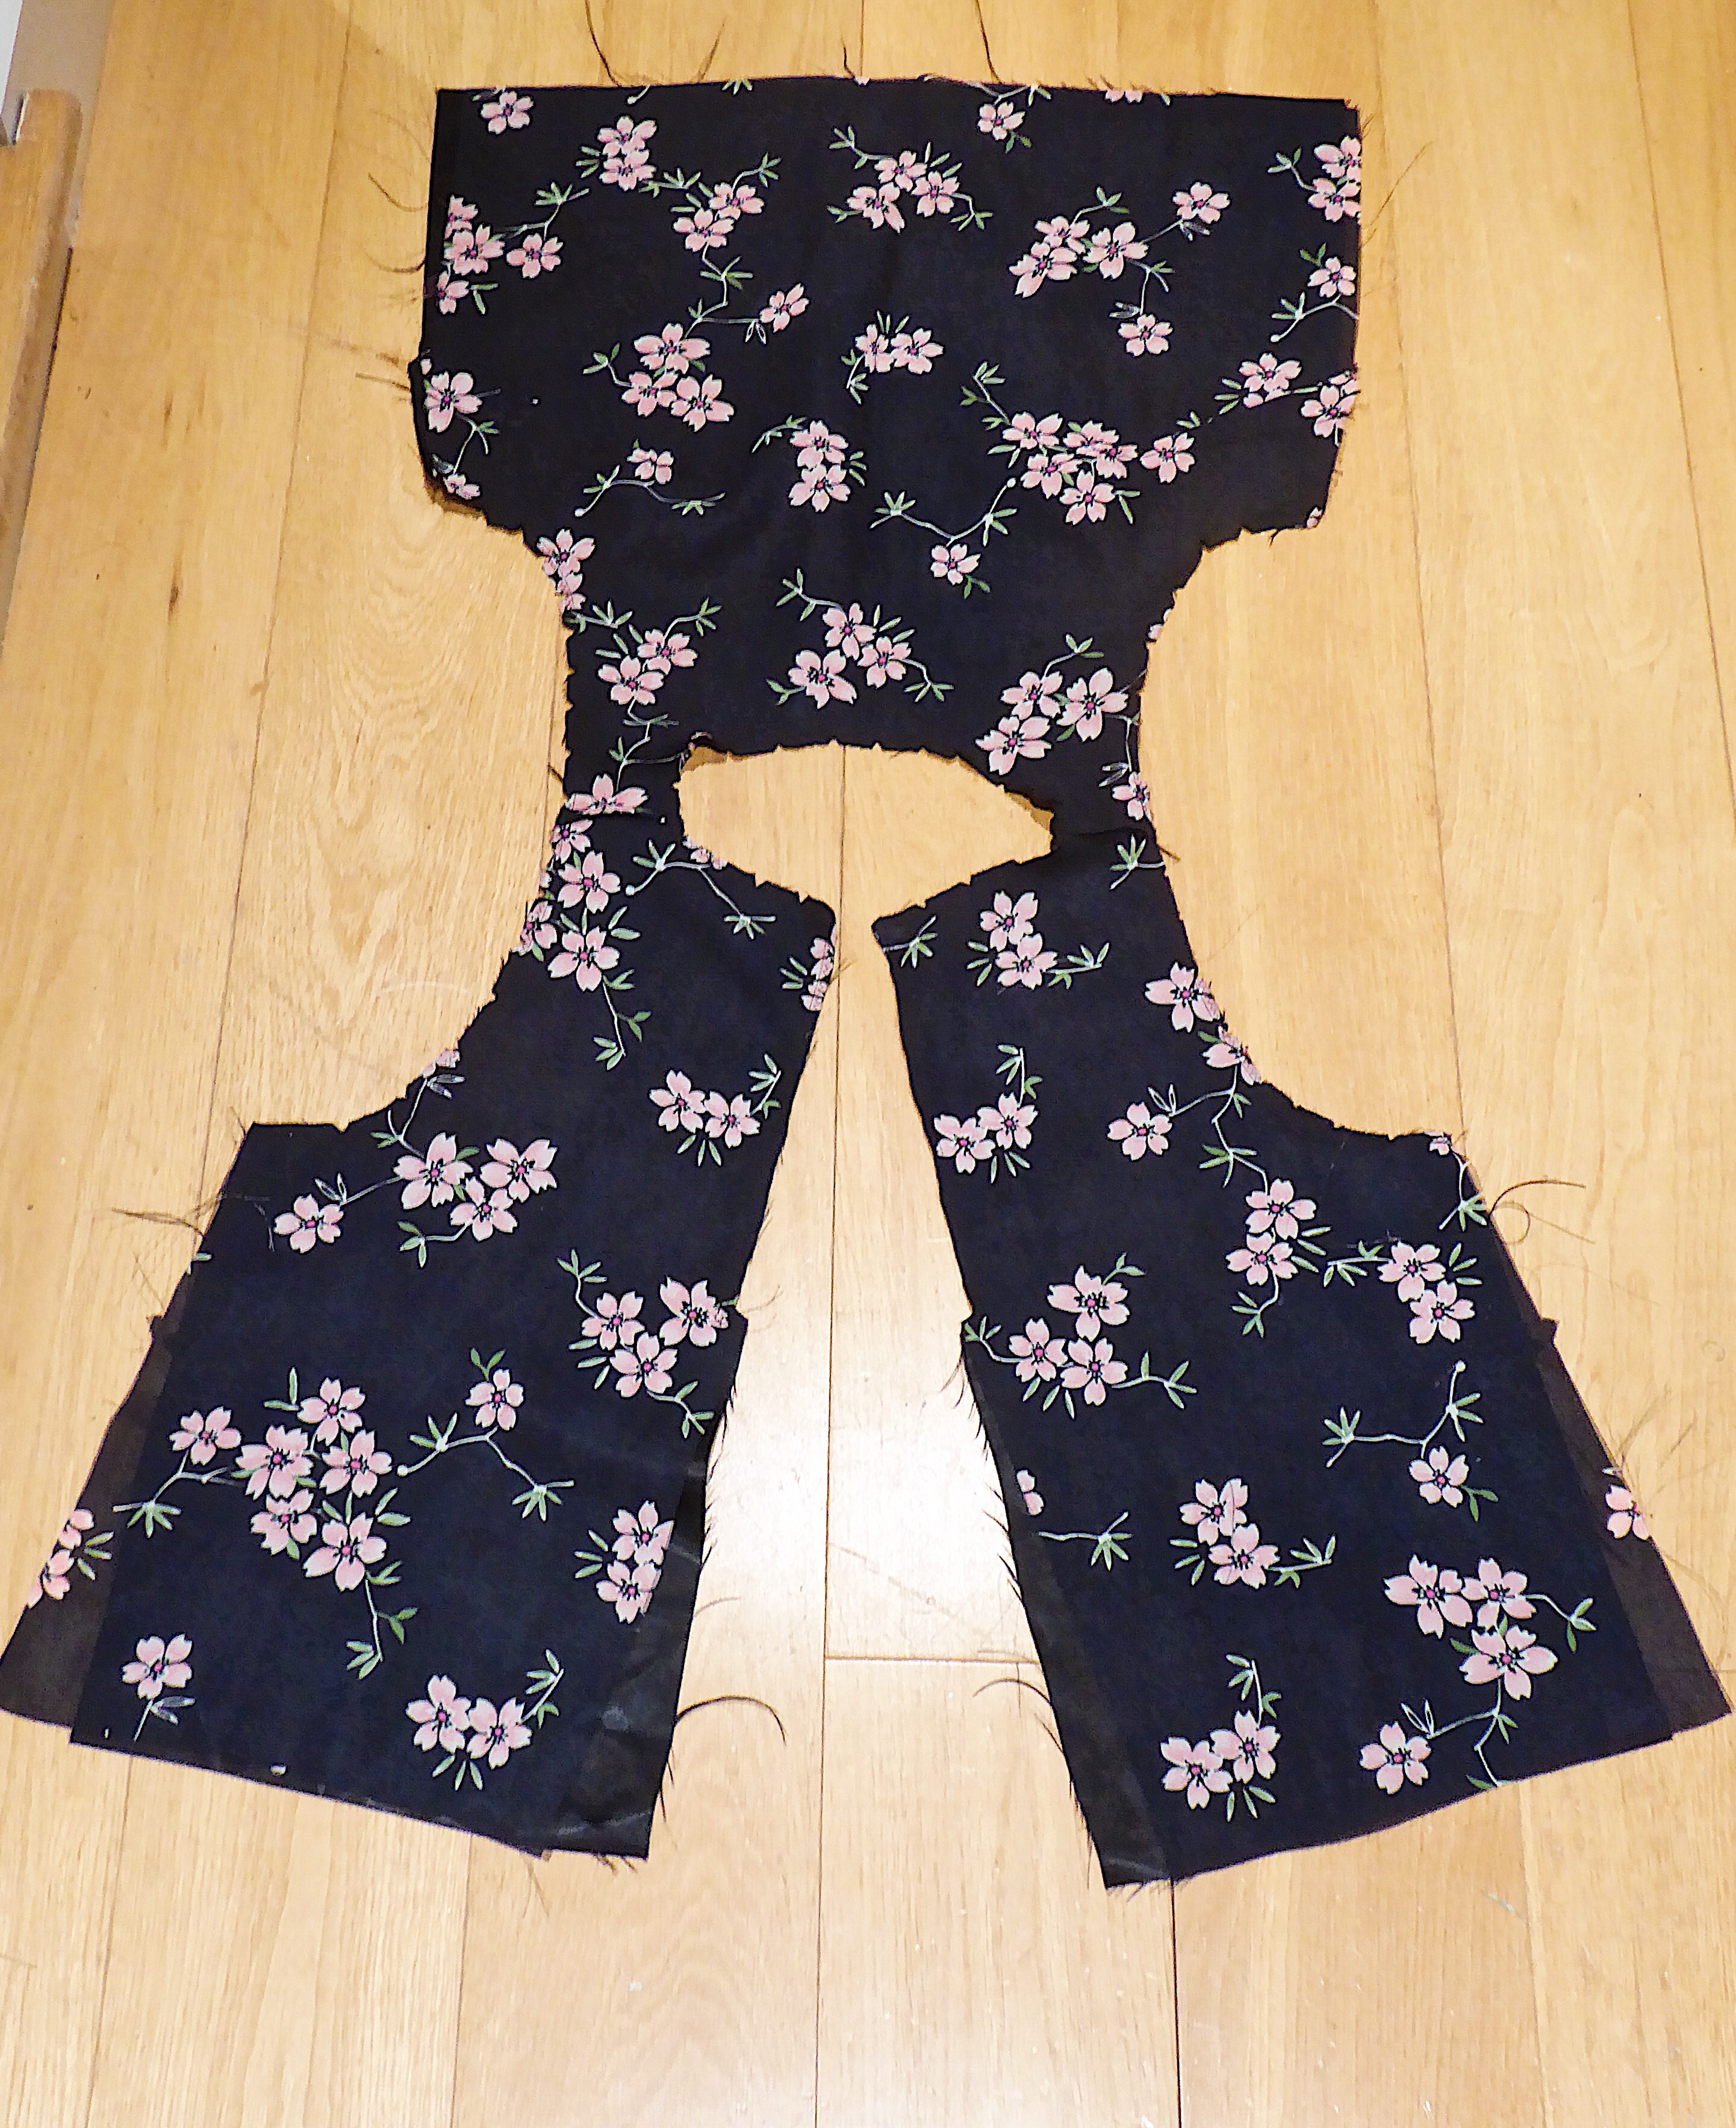
The fabric was a remnant from Sew Over It, which I bought when I strayed south of the river (can you believe it) and accidentally (ahem.. not so much) found myself in the vicinity of their Clapham shop.  I had barely a metre, and it was  a bit of a jigsaw to get all of the pieces cut out, but I got there in the end.

The fabric itself is a bit of a mystery.. they’ve sold out of it on the website, so I can’t confirm exactly what it is but if I was a gambling woman (really not, for the record) I’d say a light weight crepe.. Now, I must say, this fabric probably wasn’t my best impulse buy in hindsight.  It’s – for sure – a synthetic material (meh – I knew that when I bought it) but I have a sneaking suspicion it’s polyester… Let’s just say it’s been really unpleasant to wear in the heat wave we’ve been having recently! You live and learn… I’m now on a bit of a ‘try to buy natural fibres where possible’ stint, but who knows how long that will last.  We all know a nice rayon will come along and I’ll have broken my all-natural pledge.  Oh well… at least I’m a realist.

The Make.

This was a pretty quick make, all in all probably just over half a day’s worth of cutting and stitching.  I cut my size based on my measurements and whilst the style is supposed to be boxy, and I think it ended up being a little big on me.

This was my first time using a LMV pattern and I ended up veering away from the written instructions.. It was strange to me that the pattern has a front facing, but no back facing.. It’s crying out for a back facing, and I can’t work out why they didn’t have one.

I used french seams where possible, and zig-zagged where else (sadly without my overlocker for this make).

Verdict. 

I like how this shirt turned out, but I regret my fabric choice given how hot this summer has turned out!

I’m also not 100% convinced on some of the construction techniques used in the Bruna.. if I had my time again and I wasn’t able to buy the magazine, I think I’d try the Sew Over It Libby shirt or the Closet Case Patterns Carolyn Pyjama top; that’s for three reasons:

1. To buy the Bruna by itself is apparently 35 euro (?!) whereas the Libby is £7.50 and the Carolyn is $14.00

2. I’m not even sure you can buy the Bruna in English, so you might need to be proficient in Dutch/French/Germany (or trust Google translate!), and

3. I’ve used SOI and CCP before multiple times and their construction techniques are second to none.  If I’m committing money to something I might make multiple times, I’d go with the safe bet (see I told you I wasn’t a gambling woman).

Regal Rumana

February’s #sewmystyle challenge is the Rumana coat from By Hand London. I’ve been needing a new coat for a while and I really love the long sleek style of the Rumana, so thought I’d give it a go. Plus it’s named after one of my favourite Sewing Bee sewists of all time, so what’s not to love?!

The Pattern

This pattern is 5 A0 sheets and goodness only knows how many A4 sheets together. Nobody’s got time for that, so I decided – for the first time (aha I’m pretty cheap) – to order copyshop printed patterns. I used netprinter.com, and it got to me within a couple of days – would definitely use them again.

From the A0 sheets I received, I also diligently traced off all my pieces in a size 8… that probably took three hours, but I’m glad I did it as I’ll probably size up at the hip if I make the Rumana again.

The Fabric

For the main coat fabric, I bought some grey acrylic/wool mix from a shop on Goldhawk Road. Is the light grey colour incredibly inappropriate for the tube and most likely will need washing on a weekly basis? Yes. Do I care? No chance!

The patterns says you need 3.4m for 60″ wide fabric; I found my fabric at the end of a roll, there was only 3 metres left and honestly, I had some fabric to spare (I made a size 8).

For lining, I went to the fabric shop near my parents (Madjak in Shere) and bought some purple fabric – I’d guess a viscose mix? The pattern says 2.8m, I bought 3 metres and I had so much to spare.

I also bought some medium weight interfacing; again it says you need 2.6m, I bought 2.5 and wow I barely used any.

All in all, if you’re strapped for cash, print the pattern first and work out how much you need based on your measurements and how the pattern pieces are looking. On the Big 4 patterns, they adjust the amount of fabric you need based on your size – By Hand London haven’t done this, and I think that’s why there’s quite a bit left over.

The Make

Okay wow, this is the most complicated piece of sewing I’ve done for a really long time, maybe ever. There are so many pattern pieces, and some of the instructions and diagrams left me quite perplexed for a little while.

My first piece of advice, when you’re cutting out is don’t skimp on those notches; they are pretty few and far between, but when they do appear, they’re vital.

To start off with, the first section of instructions about pockets is very confusing. I found The Petite Passion’s blog post about it incredibly helpful. Really, they need a notch on that pocket somewhere to give you some guidance (unless there already is one and I just couldn’t spot it!).

That vent. Oh wow, did I do that wrong. The vent is supposed to be pointing to the right – mine was not. Make sure yours is!! I ended up fudging it afterwards – what a pain. Long story short, pay attention to the vent direction.

To attach the collar stand to the under/upper collar, I found the pictures really confusing – stick to the instructions and you won’t go far wrong.

I made a size 8 and shortened the coat by an inch and a half. If I make it again, I’ll measure the pattern pieces themselves instead of relying on the ‘finished garment measurements’ – in reality I’d like it to be a smidge bigger at the hips.

Verdict

Overall I’m incredibly pleased with how this coat turned out. I love By Hand London patterns but I think the instructions could be a bit fuller/with more diagrams and this is definitely not for beginners.

I should say, I made this when I went to stay with my parents for a weekend. The benefits were their 3 metre long table (I never could have managed to cut this out on the floor!) and my mum’s never ending wisdom. This blog is becoming an ode to her haha, but seriously without her there to give me pointers and advice, I don’t think I would have got it finished! Ta very much mum.

All in all though, I do really love the outcome of this project – I now have a beautiful coat if not for a few hiccoughs on the way!

Marvellous Molly Dress

I’ve been wanting to try out overlocking for a while now; finishing seams is one of my pet hates of sewing (that and hemming but let’s not get into that now.. I’ve already ranted enough!).  For Christmas I asked and was very kindly gifted (thanks parents, I’ll say it umpteen times – you’re amazing) the ‘Intro to Overlocking‘ course at the new Sew Over It shop on Essex Road in Islington. [Spoiler alert – it was fab].

The course comprised of two classes, each lasting three hours (6.30pm to 9.30pm)  and held on two consecutive Thursdays. Let’s first discuss the price.  The course cost £99, which I reckon is pretty reasonable if you look at comparable classes in London.  There’s a very similar class at Ray Stitch; at £98 and split over two sessions, it matches Sew Over It’s price but I think what you end up making at Sew Over It (the Molly Top or Dress) is much nicer than the Burda pattern at Ray Stitch.  For £99, you get tuition, the top/dress pattern, the use of an overlocker for 6 hours, and plenty of tea and cake to help the sewing process. Note that fabric isn’t included, but you do get 20% on the day of your class.

In the first class, we learnt how to thread an overlocker – at Sew Over It, they use the Janome 6234xl. Our teacher, Layla, showed us how to thread the overlocker, how to chain off, what sort of stitch we should be looking for and when it’s not right, what thread tension to change.

Seriously, it was invaluable. Sure, mayyyybbe I could have learnt that by looking at a book, but I don’t think there’s any substitute for trying the machine out for yourself, adjusting the tension until you think it’s perfect and then checking with an expert. We also got the chance to practice on all sorts of different fabrics, from chiffon to jersey to gingham.  Lastly, we also learnt how to disengage the blade, sew rolled hems and create gathers using the overlocker.

In the second class, it was onto the Molly dress (or top!).  The tuition was step by step, really easy to follow and I managed to cut out and make the Molly dress within the three hour time limit. I even wore the dress to work next day (good thing, I really needed to do some washing!).

Overall, I couldn’t recommend the course enough.  I just bought an overlocker (it arrives tomorrow!), and the course really helped with my confidence in choosing which one to buy and my ability to actually use it when it gets here!  And, I ended up with a lovely dress – what a massive bonus!

A quick bit about the dress itself.  This was such a quick pattern to sew up, all straight lines – I’m completely converted to sewing knits now!

The majority was done on the overlocker apart from the hem and cuffs which I zig-zagged. Also check out that stripe matching^!

So quick and easy – I honestly couldn’t recommend the pattern more, and I’ll definitely be make many, many more.

London Lilies

I recently moved to London and I really wasn’t taking full advantage of living in such an amazing city… that was until this top, which led me to explore my new home town a bit more.

Let’s start with the fabric, which is a remnant from Sew Over It. I’ve been a big fan of Lisa Comfort for a few years now and I’ve always wanted to visit her two shops in Islington and Clapham. Strangely the Islington shop (although I think they’re in the process of moving) is right opposite where I used to work in Angel, so I have no idea why I didn’t clock it was so close by back then… maybe it was best for my bank balance that I didn’t..!

Anyway, back to this beautiful floral fabric. It’s a medium weight chiffon I found during their remnant sale weekend. A few weekends ago I found myself at a loose end and saw Sew Over It advertising their remnants sale (50% off) on their Instagram stories. My initial thought was ‘oh that sounds great, I wish I could go…’, then minutes later ‘Iz, you don’t live in Ireland anymore, why don’t you go?’ Honestly it’s almost not real to me that I actually have all these amazing places to visit on my doorstep! So off I trotted to Angel on a Saturday morning to visit their shop and picked up a few bits and pieces.. then I may have visited Clapham the following day and found this gem. It was just 65cm of material but at about £2, I couldn’t resist!

In terms of construction, the pattern was free with Sew magazine (view A of Simplicity K8128) – I used the front and back pattern pieces, but ignored the facings because the fabric was so see-through that I decided I needed to fully line it.

In fact, the lining brings another London-link – it was in my fabric stash, having bought it at the Great British Sewing Bee Live at the Excel, from the Simply Fabrics shop based in Brixton. I’m yet to visit their physical shop, but it’s definitely on my list!

I kind of ignored the pattern instructions and just winged it; I chose to attach the front to back at the shoulders, sew the fabric to the lining and pull-through at the shoulders. I’m sure there’s a technical term for that technique but for the life of me I can’t think what it is (if you do, let me know!). Before sewing round the neckline and armholes, I remembered (a little smugly I’ll admit) to insert a little loop of elastic for the keyhole back closure.

Following on from my previous rant about finishing hems and seams, I decided to use French seams throughout, having been reminded of them by The Demented Fairy (sorry I got your name wrong before!) – thanks! Such a neat finish.

As I said, the top has a keyhole back, and I used a cute flower button to secure the loop of elastic. I purchased the button at another recent London excursion to Liberty. I’d never been before and ended up buying 4 buttons – very restrained of me I thought (ahem and just about the only useful thing I could afford..!).

The final link to London in this top comes from the photo location. I’m a time-poor (ahem and lazy…) sewist so if I can take photos at or near my home, frankly, I will do. However these photos were taken near Portobello Road (Notting Hill area.. and no sadly I don’t live anywhere near there!) and the colour of the pink house just went so well with the flowers of the fabric! I will say, it was bloomin’ freezing and I braved taking off my nice warm coat and scarf to stand in the cold to take these photos – my dedication to the ‘gram astounds even me.

All in all, I’m so pleased with this top. It’s suitable for work (yay!), was so quick to make and cost hardly anything at all – a winner in my book. Plus it led me to explore a little bit more of London, all on my doorstep which is an added bonus. I fully intend to keep this exploring up, but I’ll also be realistic and say, it’s basically winter and I just turned on the heating, so don’t expect too much of me..! Any London recommendations are welcome – be it fabric shops or blog photo locations!

Blog at WordPress.com.

Up ↑